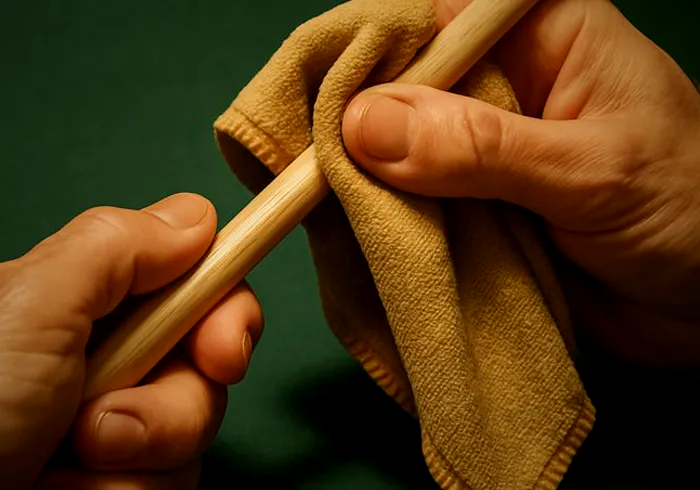
How to Refinish a Pool Cue: Step-by-Step Guide
Most cues that look like they need a refinish only need a deep clean and a finish restorer. The ones that truly need stripping (finish chipped through to bare wood, peeling clear coat, a sticky or gummy butt) can be done at home with sandpaper, a wipe-on finish and a week of patience. Shops charge around $150 for a butt refinish and $300 or more for a complete cue, so the DIY savings are real.
One rule matters more than any grit chart: the butt gets a protective finish, and the shaft does not. A shaft gets cleaned and burnished with at most a thin seal, because a coated shaft drags through your bridge.
Refresh, refinish, or leave it alone
Start by matching the problem to the smallest fix that solves it. Stripping a cue that only needed cleaning wastes a week and risks the decals.
| What you see | What it usually needs | Effort |
|---|---|---|
| Dull, grimy butt, finish intact | Clean with a damp cloth, then cue wax or a finish restorer | An hour |
| Light scratches and water marks in the clear coat | A non-stripping restorer (Howard says Restor-A-Finish works on lacquer, shellac, varnish and most polyurethane) or a micro-mesh polish | An afternoon |
| Sticky, gummy feel on the butt | Clean first; if it stays tacky, the finish has failed and needs stripping | Full refinish |
| Chips through to bare wood, peeling or cloudy clear coat | Strip and refinish the butt | A week, mostly drying |
| Dirty, dinged or sticky shaft | Clean, raise dents, smooth, seal thin, burnish (no film finish) | An evening |
| Rare or collectible cue | Leave it original and ask a dealer or cue maker first | None |
For a routine cleaning walkthrough, see how to clean a pool cue.
Check the cue before you put work into it
Roll the assembled cue on a flat table and watch the tip end. A shaft that lifts or wobbles is warped, and no finish will fix that (our warped cue guide explains the test). Screw the joint together and feel for play or a gap at the collar. Look at the ferrule for cracks.
Then decide what kind of finish is on the butt now. A thick, glassy, hard shell is usually lacquer, polyurethane or a catalyzed automotive-style clear, and it has to come off with coarser paper or a stripper. A thin, satin, almost bare feel is usually an oil finish, which sands off easily at 320. Some factory cues are not meant to be refinished at home at all: Predator, for example, lists several models (including the P3, the 526 Series and the Blak 3 Series) that it says cannot be refinished.
Finally, think about value. If the cue might be worth money to a collector, refinishing it can cut what it sells for. Read are old pool cues worth money before you sand anything with a famous name on it.
Tools and materials
- Sandpaper: 120, 220, 320, 400 and 600 grit (cloth-backed aluminum oxide holds up on round work); add 80 if you are stripping thick lacquer
- A micro-mesh pad set (1500 through 12000) for final polishing and for the shaft. Retailers rate the 1500 pad as roughly equal to 600 grit paper
- Painter's tape to mask the wrap, joint collar, butt cap and any decals you want to keep
- Mineral spirits (white spirit) and paper towels for the solvent wipe
- Your finish: a drying oil (tung, Danish or boiled linseed) or a wipe-on polyurethane
- Lint-free rags and gloves, plus a respirator if you use a stripper or sanding sealer
- 0000 steel wool for buffing an oil finish
- For the shaft: a shaft cleaner, very fine abrasive (micro-mesh or McDermott McMagic papers), a leather burnisher, and a thin sealer or cue-specific shaft wax
- Optional: a citrus or gel stripper for thick finishes, and a way to hang the cue vertically while coats dry
You do not need a lathe for an oil or wipe-on finish. A lathe gives a shop perfectly even sanding and a mirror gloss, and that is most of what you pay for.
How to refinish the butt, step by step
- Take the cue apart and mask it. Unscrew the shaft, put a joint protector or tape over the threads, and tape a clean line where the wrap meets the finish, around the joint collar and around the butt cap or bumper. Tape over decals you plan to keep.
- Wipe it down with solvent. Mineral spirits on a paper towel lifts years of hand oil and chalk. Cutting through grime clogs paper and drags dirt into the wood.
- Raise dents before sanding. On bare or nearly bare wood, a drop of water or a damp cloth with a warm iron can swell a small dent back up. This does not work through an intact hard finish, and it does nothing for chips where wood is missing.
- Remove the old finish. On a lacquered or poly cue, sand with 80 to 120 grit until no shiny patches remain under a light, or use a stripper and scrape gently. On an oil-finished cue, start at 320 (240 for scratches). Sand along the length of the cue, rotate it constantly so you never create a flat, and change paper as soon as it loads up.
- Work up the grits. Go through 180, 240 and 320 after stripping, then 400 and 600. Each grit should erase the scratches of the last one. Check under a raking light; any scratch you can see now will look worse under finish.
- Clean off the dust. Wipe with a barely damp cloth or a tack rag and let it dry. Dust trapped under the first coat is permanent.
- Apply the first thin coat. For oil, flood it on, let it soak about an hour, then wipe off every bit of excess. For wipe-on poly, wipe a thin, even coat along the length with a lint-free cloth.
- Let it dry, then scuff. Oil needs about 24 hours between coats. Wipe-on poly is usually ready to recoat in a few hours, but follow the can. Before the next coat, scuff lightly with 0000 steel wool (oil) or 600 grit or the 1500 micro-mesh pad (poly).
- Build the finish. Two or three oil coats is typical, and you are done when no dry spots appear an hour after a coat. Wipe-on poly goes on thin, so plan on more coats to build the same protection as a brushed finish.
- Cure, then polish. Let the last coat cure for several days before hard use. Then work up through the micro-mesh pads for a deep, even sheen, peel the tape, and clean any finish off the joint face and threads.
Hang the cue vertically by the joint end between coats so nothing touches the wet finish.
Oil, wipe-on poly, lacquer or wax: which finish
| Finish | Look and feel | Protection | DIY difficulty | Pick it if |
|---|---|---|---|---|
| Drying oil (tung, Danish, boiled linseed) | Satin, warm, close to bare wood; shine grows with buffing over weeks | Light; easy to renew | Easiest; hard to ruin | You want a natural feel and plan to re-oil now and then |
| Wipe-on polyurethane | Satin to gloss depending on coats and polishing | Good against moisture and handling | Moderate; thin coats prevent runs | You want a durable, glossy factory look without a spray rig |
| Sprayed lacquer or catalyzed clear | Deep, hard, high gloss | Best | Hard without spray gear and a lathe | The cue has value; send it to a shop |
| Wax only | Slight sheen over existing finish | Minimal | Trivial | The old finish is sound and just needs a refresh |
Our pick for a first home refinish is a drying oil on a house cue or beater, and wipe-on poly when you want it to look like it came from the factory. One hard warning on oils: use a drying oil. Raw linseed oil is not one, and handmadecues.com warns it will not cure into a proper finish. Boiled linseed oil dries, and so do tung and Danish oil.
Oily rags from drying oils heat up as they cure and can catch fire in a pile, a hazard the National Park Service fire prevention article explains. Lay used rags flat outdoors to dry before you throw them out.
The shaft gets a different treatment
Never put a film finish like poly or lacquer on a playing shaft. It feels sticky sliding through your bridge, which is the opposite of what a shaft is for. Here is the shaft routine instead:
- Clean it with a shaft cleaner or a little isopropyl alcohol on a cloth. Wipe; don't scrub one spot.
- Raise dings with a drop of water and a quick burnish, or a damp cloth and warm iron for deeper ones.
- Smooth with very fine abrasive only: micro-mesh, McMagic papers or 1500-grit paper wrapped around the shaft. Keep it moving along the full length with light pressure. Sanding one spot creates a dip you will feel forever, and coarse paper changes the taper fast. Stay off the ferrule.
- If the wood feels raw and porous, a single thin coat of sanding sealer over the taper, smoothed again once dry, closes it up.
- Burnish with a leather pad until the wood feels warm and glassy, then add a thin coat of cue-specific shaft wax and burnish again.
A caution from the manufacturer: McDermott's maintenance page warns against shaft products containing silicone or lanolin, saying they soften the wood. Stick with products sold for cue shafts and keep any wax coat thin. The full method is in how to burnish a cue shaft, and our cleaner picks are in best pool cue shaft cleaner.
Protecting decals, inlays and the wrap
Production cue graphics are usually decals under the clear coat, and 120 grit goes through them in a few strokes. If you want to keep a decal, tape it off and hand-sand around it, or only scuff the clear over it with 600 grit and let new finish seal it back down. A faint transition line is better than a lost logo.
Real inlays (pearl, ivory substitutes, contrasting woods) tolerate sanding better, but sharp inlay corners can catch paper and lift, so hand-sand those areas gently.
The wrap stays taped off the whole time. If it is frayed or filthy, a refinish is the right moment to replace it, because the shop or you will be handling the butt anyway. See how to rewrap a pool cue.
How long it takes and what it costs
| Job | DIY time | Shop price (published price lists) |
|---|---|---|
| Shaft clean or recondition | An evening | $15 to $25 at Seybert's; $30 for a shaft refinish at Joss |
| Butt refinish | An afternoon of sanding, plus several days of coats and cure | $150 at Joss Cues |
| Complete cue refinish | A weekend of work over about a week | $300 and up at Schon; from $375 at Predator, with an 8 to 24 week turnaround |
DIY materials come down to sandpaper and a small can of finish, plus tape and a micro-mesh set, and most of those last for several cues. Shop prices change, so call before you ship a cue. Our pool cue repair costs guide covers other jobs.
Common mistakes
- Sanding in one spot to chase a ding, which leaves a flat or a dip
- Starting at 80 grit on an oil-finished cue that only needed 320
- Sanding through a decal you meant to keep
- Thick coats. They sag, take forever to cure and show every fingerprint
- Recoating before the last coat is dry, which traps solvent and leaves the cue tacky for weeks
- Using raw linseed oil, which never properly dries
- Putting poly or lacquer on the shaft
- Getting finish on the joint face or threads, which keeps the cue from seating
- Wadding oily rags in the trash
When to pay a shop
Refinish a house cue or a garage-sale find yourself; it is the right cue to learn on. Pay a cue repair shop when the cue has collector or sentimental value, when you want a lathe-sprayed gloss, when the joint is loose or the forearm has a crack, or when it needs a new wrap and ferrule at the same time. If the cue is a current factory model, contact the maker first, since some offer refinishing and some models cannot be refinished at all.
Sources
- Handmade Cues: Re-Finish (grit sequence, oil drying times, drying-oil warning)
- McDermott Cue: maintenance tips (shaft products, storage)
- Predator Cues: repair information (refinish price, turnaround, models that cannot be refinished)
- Joss Cues: repairs and Schon Cues: repairs (refinish prices)
- Seybert's: pool cue repair (shaft service prices)
- Howard Products: Restor-A-Finish (which finishes it works on)
- Micro-Surface: Micro-Mesh Soft Touch pads (grades)
- National Park Service: spontaneous combustion (oily rag safety)
Our picks
Links open the current selection and price on Amazon so you can compare real reviews before buying.

Micro-Mesh Soft Touch Sanding Pads
Final polish and shaft smoothingFoam-backed pads in graded steps take a cured butt finish from scuffed to a deep gloss and smooth a shaft without eating into the taper. The foam conforms to a round cue, which is the detail flat paper gets wrong.
Check price on Amazon
ScotchBlue Original Painter's Tape, 2 in.
Masking the wrap, collar and decalsClean tape lines are what make a home refinish look professional at the wrap edge and joint collar, and painter's tape peels off without lifting the finish you are trying to keep.
Check price on Amazon
Howard Restor-A-Finish
Refreshing a sound finish without strippingTry this before you sand anything. It penetrates an existing finish to blend out light scratches and water marks, and if it works you have saved yourself a week of coats.
Check price on Amazon
McDermott Silky Shaft Wax
Slick shaft finishA thin burnish-in wax made for cue shafts, so the shaft stays sealed against hand oil while keeping the glassy, fast feel that a coated shaft loses.
Check price on Amazon
Porper Suede Leather Shaft Burnisher
Burnishing the shaft after smoothingBurnishing is the step that closes the grain after fine sanding, and a leather burnisher does it faster and more evenly than a scrap of paper bag.
Check price on AmazonFrequently asked questions
What grit sandpaper should I use on a pool cue?
On the butt, use 80 to 120 grit only to strip lacquer or poly, or start at 320 on an oil finish, then go through 400 and 600 before finishing and polish with micro-mesh afterward. On the shaft, stay at very fine abrasives (micro-mesh, McMagic papers or about 1500 grit) with light pressure along the full length.
Can I refinish a cue without taking it apart?
Yes. Unscrew the shaft, then tape off the wrap edges, joint collar and butt cap and work around them. Wraps and bumpers are not designed for casual removal, so masking is the safer route unless you are replacing the wrap anyway.
How long does it take to refinish a pool cue?
Sanding takes an afternoon. Oil finishes need about 24 hours between coats and two or three coats, and wipe-on poly needs several thin coats with a few hours between them. Give the last coat several days to cure before you play with it, so plan on about a week.
What is the best finish for a pool cue butt?
For a home job, a drying oil such as tung or Danish oil is the easiest and gives a natural satin feel. Wipe-on polyurethane gives more protection and a glossier factory look. Sprayed lacquer or catalyzed clear is the most durable but is a job for a shop with spray equipment and a lathe.
Should I put polyurethane on a pool cue shaft?
No. A film finish on the shaft feels sticky and drags in your bridge. Clean and smooth the shaft, seal it with one thin coat of sanding sealer if the wood is raw, then burnish and apply a thin cue shaft wax.
How much does it cost to have a pool cue refinished?
Published shop prices run about $150 for a butt refinish (Joss Cues) and $300 or more for a complete cue (Schon), with Predator quoting from $375 for its own cues. A shaft cleaning or recondition is usually $15 to $30.
Why does my cue butt feel sticky?
Usually it is hand oil and grime on the finish, which a cleaning fixes. If the butt stays tacky after cleaning, the finish itself has broken down or was recoated too soon, and the fix is stripping it and refinishing.
Will refinishing lower my cue's value?
On a collectible cue it can, because collectors pay more for original finish. On a production or house cue, a clean refinish only helps. Get an opinion from a dealer or cue maker before refinishing anything rare.
Related guides
LeaguePool is reader-supported. When you buy through links on this site we may earn an affiliate commission at no extra cost to you. As an Amazon Associate we earn from qualifying purchases.